We love conversion tracking with LinkedIn ❤️ because it’s really easy and simple to set up!
LinkedIn Ads doesn’t overcomplicate conversion tracking, so you can be tracking conversions on your website in no time at all! Carry on reading to find out more…
Conversions
Conversions are the valuable actions that people take on your website. For example, a contact form submission, a PDF download, a purchase or even an event registration.
They can also be micro-conversions like a CTA (Call-To-Action) button click, a newsletter subscription or any other smaller conversion step in your funnel.
Why should I track conversions on LinkedIn?
It’s important to be able to track conversions on LinkedIn because this shows us how many people performed a valuable action after seeing one of our LinkedIn Ads. We can then use this data to measure the success of our LinkedIn Ads campaign and its ROI, as well as the impact it has on our business and marketing goals.
In this post
Before we go any further…
In order to set up conversion tracking on LinkedIn Ads you must have already installed the LinkedIn Insight Tag.

Secondly, you must have a unique URL or “Thank You/Confirmation page” that a user is redirected to upon completion of your conversion goal.
(For example, after a form submission a user is taken to a unique thank you page like “/thank-you/”).
If you don’t have this functionality then you will need to look into “Event-Specific” Conversion Tracking on LinkedIn.
This is the “Event-Specific” Method that we mention below.
Conversion Tracking Methods On Linkedin Ads
LinkedIn provides us with two methods for setting up conversion tracking. One is the Page Load method and the second is the Event-Specific method.
LinkedIn recommends that we go with option 1, the page load method.
This is by far the easiest and simplest method of conversion tracking on LinkedIn Ads, so this is the one we are going to focus on in this article. It is also the one that is most accessible to website owners and marketers.
However, one thing to bear in mind is that your method of conversion tracking will likely be determined by what functionality you have access to on our website.
- You can use this method when you have a unique URL that a user visits upon completion of a conversion. For example this could be a confirmation or thank you page.
- It works by allowing you to create different URL match rules in order to trigger your conversion.
For example, you can create a conversion for when people land on your thank you page. So you would set up a match rule for www.mywebsite.com/thank-you/.
- You can use this method when you do not have a unique URL that you can create a conversion from. For example, a PDF download or no thank you page after a form submission. Also most commonly used for
button clicks. - It works by allowing you to add a piece of code snippet that loads when the action you’re trying to track is performed.
You can read our LinkedIn Ads Event conversion tracking guide here.
How To Set Up Conversion Tracking on LinkedIn Ads
Firstly, you need to sign in to LinkedIn and navigate to LinkedIn Advertising.
Select the ad account you want to set up conversion tracking for and go to your campaign manager.
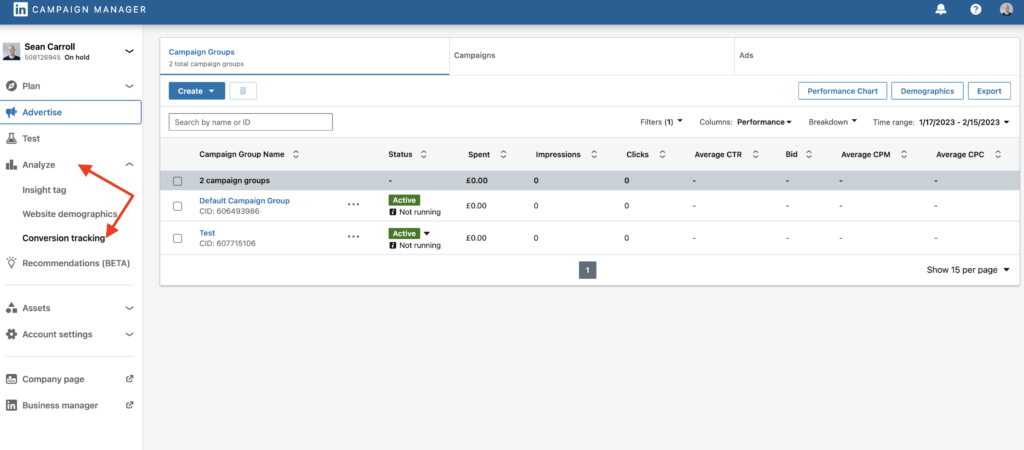
Step 1:
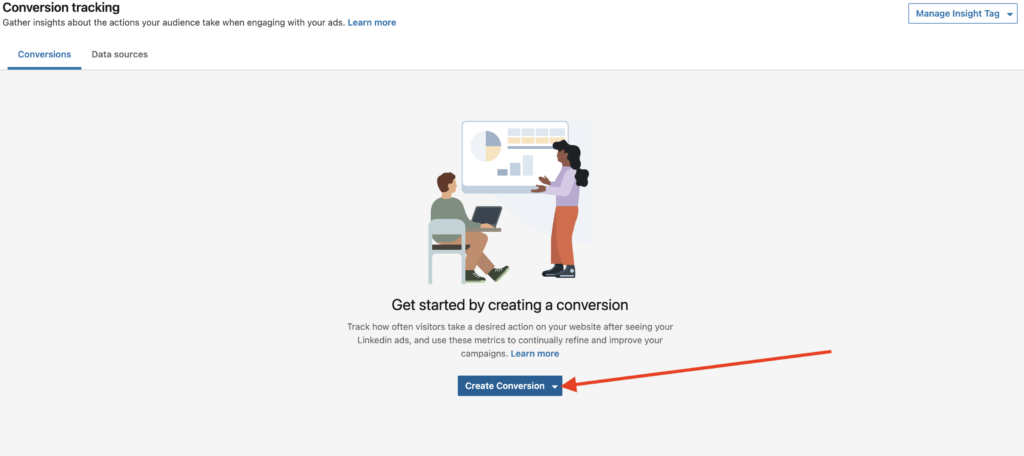
On the left hand side navigation panel you need to go to the “Analyze” drop down option and then to “Conversion Tracking”.
Step 2:
You need to click on “Create Conversion” and select “Online Conversion”.
Step 3:
You will now be on the “Create Online Conversion” setup pages. The first thing to do is to give your conversion a name.
Try to make this a descriptive name of the conversion action you are trying to track. For Example, “Thank You Page” or “Confirmation Page” or “PDF download”.
Step 4:
LinkedIn Ads Conversion Type
You will need to click on the dropdown menu underneath the sentence “Define the key conversion behavior you want to track”
This will bring up a list you can choose from to define the type of conversion you’re looking to track. This helps you and LinkedIn Ads classify and categorise what type of conversion you are setting up and it also has an impact on how LinkedIn counts conversions.
Top Tip
For example, the “Purchase” and “Add To Cart” conversion types may track multiple conversions by one user if they complete more than one conversion event in the conversion window. This is because, one individual may complete more than one “Purchase” within your conversion window.
You can choose from the following conversion types:
Leads
Apply job
Book Appointment
Complete Signup
Download
Install
Lead
Outbound Click
Register Event
Request Quote
Save
Schedule
Sign Up
Start Trial
Submit Application
Sales
Add Billing Info
Add to Cart
Donate
Purchase
Start Checkout
Subscribe
Other
Ad Click
Ad View
Add To List
Contact
Key Page View
Login
Other
Phone Call
Search
Share
View Content
View Video
Step 5:
LinkedIn Ads Conversion Value

Firstly, it’s important to mention that LinkedIn Ads does not support the more enhanced eccommerce tracking solutions that we might be more used to with Meta and Google Ads.
What we mean by that is that LinkedIn does not have the functionality to bring in dynamic values to your conversion tracking measurement.
However, you can still choose to include a static or single conversion value if you wish.
So, if you know that your event costs £99 to attend and this price does not change, you could fill this section in with that value.
Or if people are purchasing your online courses and you calculate the average order value to be £75, you could decide to include your average order value here.
Or you can choose to leave this section blank.
This option allows you to assign a monetary value to your conversion goal so that you can more easily measure your campaigns ROI.
Step 6:
LinkedIn Ads Conversion Window (Attribution Window)
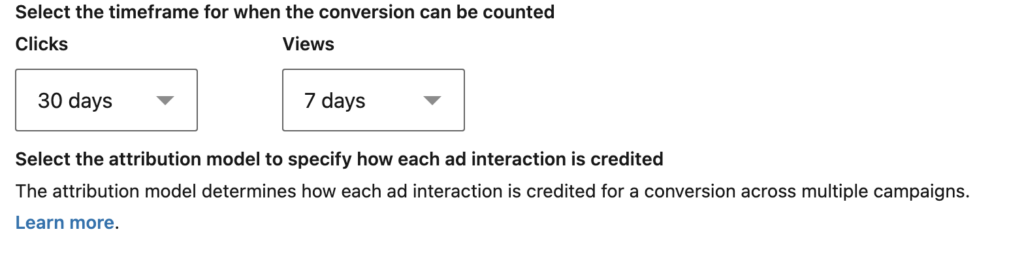
The next setting is to “select the timeframe of when the conversion can be counted” and this needs to be done for both the “Click” conversion window and the “View” conversion window.
A conversion window or attribution window is the timeframe in which a conversion can be attributed to your LinkedIn Ads. This can be customised in your conversion tracking set up, letting you choose whether to have a short conversion window or a more generous and longer conversion window.
What is a click-through conversion window?
The “Click” conversion window is the timeframe in which someone has clicked on your ad and then completed a conversion.
What is a view-through conversion window?
The “View” conversion window is the timeframe in which someone has viewed your ad and then completed a conversion.
LinkedIn conversion window settings
The default setting here will most likely be 30 day click conversion window and 7 day view conversion window.
This means that LinkedIn will count a conversion if it is performed within 30 days of a click on your ad or within 7 days of when your ad was viewed.
When deciding on this setting you should think about the average time it takes one of your customers or clients to convert. If you have a long sales funnel, then a longer conversion window setting would be more appropriate.
However, if your clients or customers tend to make a decision quickly, then you would have a shorter conversion window.
You should also consider the type of conversion too, for example, people tend to take longer to consider larger purchases compared to smaller purchases, or more likely to download a PDF than submit an enquiry form. All of this should inform you decision of what conversion window to set up.
To give yourself a much more generous conversion window then you can go for the maximum setting of 90 day click and 90 day view.
Step 7:
LinkedIn Ads Attribution Model
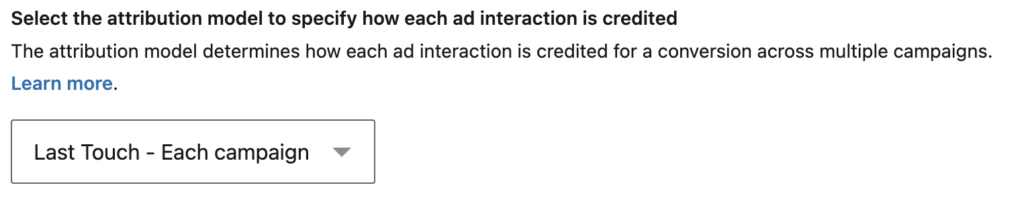
You’ll now need to select how the conversion is assigned to your LinkedIn Ads campaigns.
You’ll need to decide whether you want:
– Conversions to show on each and every campaign that has had an interaction within the conversion window (Each Campaign).
Or
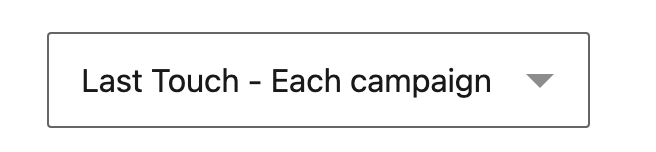
– Conversions to show only on the campaign that has the last or most recent interaction (Last Campaign).
In our experience, we find the “Last Campaign” option to be the most appropriate in the majority of circumstances.
This is because the “Each Campaign” option can cause a bit of confusion when you are managing your LinkedIn Advertising campaigns. This is due to it showing multiples of the same conversion across your campaigns.
It can lead you to believe that there is a larger discrepancy between your data analytics platforms and give you an inflated number of conversions in your LinkedIn Ads campaigns, if you’re not looking at your data currently.
Whereas the “Last Campaign” option doesn’t give us this problem and keeps things nice and simple. It assigns one conversion to one campaign which allows for easier campaign management, measurement and optimisation.
Step 8:
Select The Campaigns You Want To Track With Your Conversion
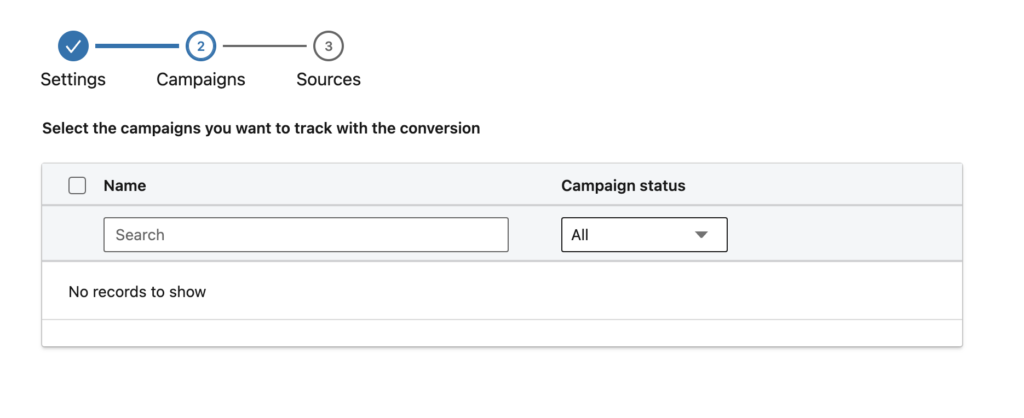
You’ll need to click the “next step” button and head to the second page. On here you will find the option to select the campaigns that you wish to track with your conversion.
If you have existing campaigns that you would like to assign your conversion to, you can select these here.
But you can also do this within the individual campaign settings themselves at a later date.
You can also not select any campaigns if you have not set up your campaign(s) yet.
Step 9:
Define Your Conversion Tracking Method & URL
You’ll need to click “Next Step” and head to the third page.
Here you will find the remaining settings for your conversion setup.
By default you should have “Page Load” selected. If it isn’t selected then please select this option.
(Read our LinkedIn Conversion Tracking using Events guide here – for setting up conversions like button clicks).
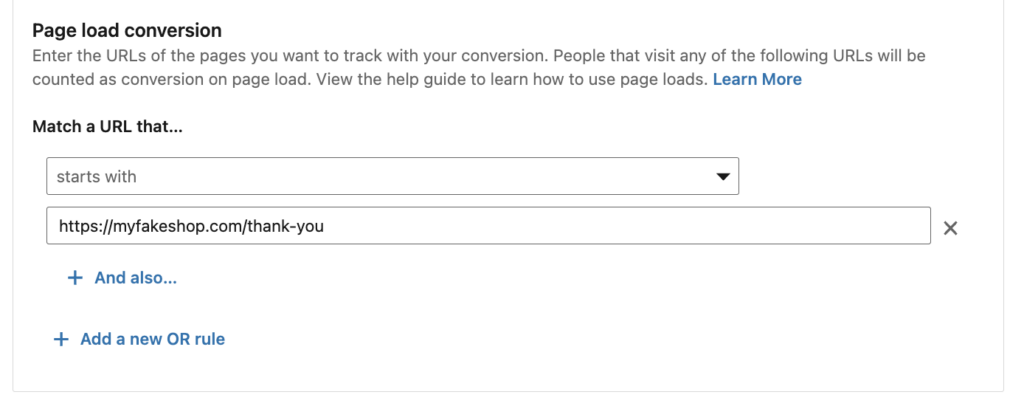
Then we’ll need to define the URL we want to track as a conversion.
So in our example we have this page: https://myfakeshop.com/contact/
Let’s pretend this is a lead form or an event registration.
Upon submission the user is taken to a unique thank you page: https://myfakeshop.com/thank-you/
So we know that people who visit this thank you page have completed a form submission.
Therefore, a page load on this page can be classed as a conversion.
So where it says “Match a URL that…” We can select “Starts With” and then paste our URL: https://myfakeshop.com/thank-you/
Conversion settings for multiple pages
You also have the option to select that the URL is “Exactly” or “Contains” which can be useful if you have multiple thank you pages.
For example, let’s say you have 3 thank you pages:
https://myfakeshop.com/thank-you
https://myfakeshop.com/thank-you-2
https://myfakeshop.com/thank-you-3
You could change the option to “Contains” and paste:
https://myfakeshop.com/thank-you
and that would trigger a conversion each time any one of those thank you pages are loaded.
Example 2
Or let’s say you just wanted to track one of those Thank You Pages; you could use the “Exactly” option and paste:
https://myfakeshop.com/thank-you-2/ as the URL.
That would then only a count a conversion when someone visits that particular Thank You page.
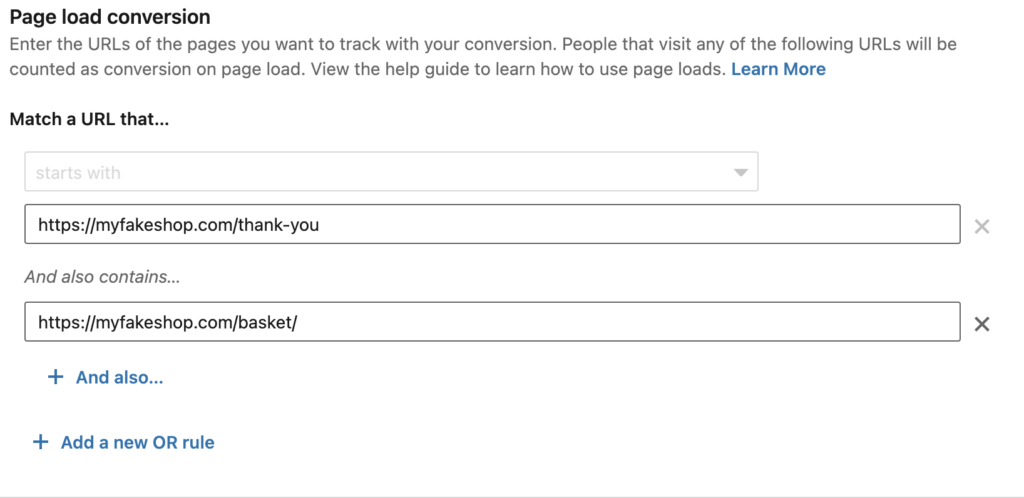
You can also combine these with additional URL match filters with the “And” or “Or” options.
This can be helpful if you want to measure a conversion more specifically to a particular user journey.
For example, let’s say you want to create a conversion for when someone submits a form but then also goes to view their basket/cart.
In this case we’d have these two pages:
https://myfakeshop.com/thank-you
https://myfakeshop.com/basket/
So we could set up the following:
Step 10:
Click the “Create” Button and there you have it! You’re conversion is ready to collect data.
How To Test LinkedIn Conversion Tracking
Finally, it’s always good to test if you’re LinkedIn Ads Conversion Tracking is working.
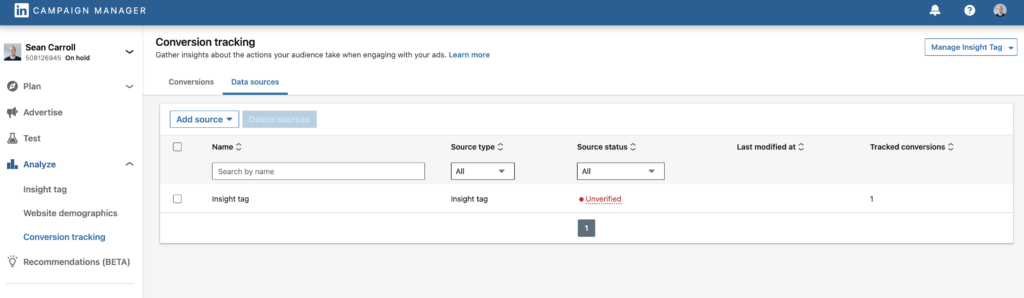
If you head back to the “Analyze” drop down menu on the left hand panel.
Then click on the “Data Sources” Tab you will first be able to see if LinkedIn is receiving signals from your LinkedIn Insight Tag.
If this says “unverified” then this could indicate that something is not quite right with your Insight Tag or LinkedIn may need a little bit more time to register that it has started to receive data from your insight tag (usually if you’ve only just installed it).
Make sure that you are getting traffic to your website. Keep checking back over the next 24 hours and if you still see the “unverified” notice, you may need to troubleshoot the LinkedIn Insight Tag setup on your website.
You should see the “Active” status.
If you see this notification you can then pop across to the “conversions” tab where you will see a list of all of your conversions that you have set up. Each of these should give you a notification of when the last signal was received by LinkedIn Ads.
If you wanted to test this, you could complete the conversion action yourself and then wait for that signal to be received in the conversion tab on LinkedIn Ads.