Scalable Vector Graphics, commonly known as SVGs, have become an essential image format in the digital world. These images are created using vector data comprising points and lines instead of pixels. The remarkable characteristic of SVGs lies in their ability to be scaled to any size without compromising quality.
If you work with high-quality digital logos and graphics, you should strongly consider saving your files as either PNG or SVG formats. Both of these file types are versatile and offer excellent resolution, even when enlarged to a considerable extent. However, SVGs have an edge over PNGs in terms of file size.
SVGs are significantly smaller, reducing the risk of slowing down your computer or website. It’s worth noting that highly intricate designs may still pose a challenge for SVGs, potentially impacting performance. Nonetheless, as a vector file format, SVGs can be scaled up or down without any loss in quality.
Now, let’s delve into how you can create SVGs using Canva, a popular graphic design tool known for its user-friendly interface and abundant features.
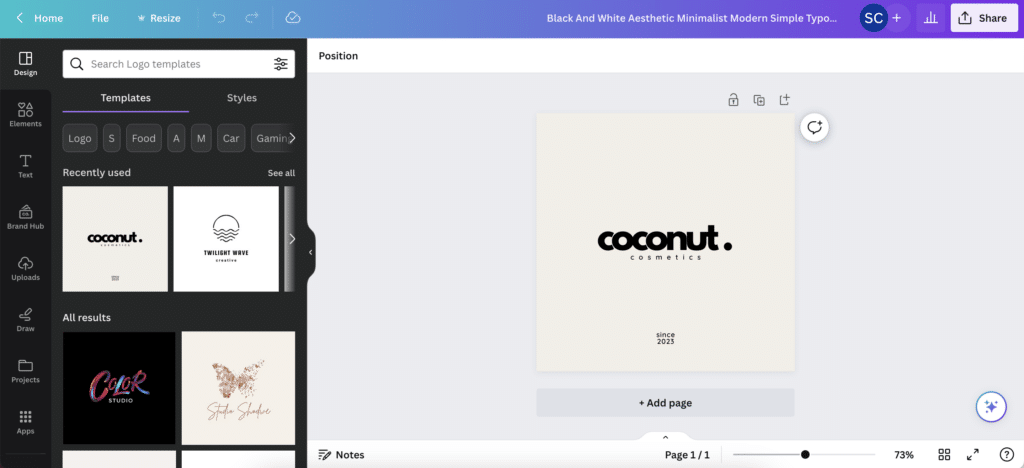
To begin, open Canva and select the desired shape or design you wish to create. Canva offers a wide range of pre-designed templates and customisable elements to suit various design needs. Once you have chosen the base design, proceed to customise it further by adding text, selecting colours, and incorporating other details that align with your vision.
As you work on perfecting your design, take advantage of Canva’s intuitive tools and features to bring your creative ideas to life. Experiment with different fonts, font sizes, and text arrangements to achieve the desired visual impact.
Additionally, explore the extensive colour palette to find the perfect hues that complement your design. Canva provides a wide array of colour options, ensuring you can achieve the precise look you envision.
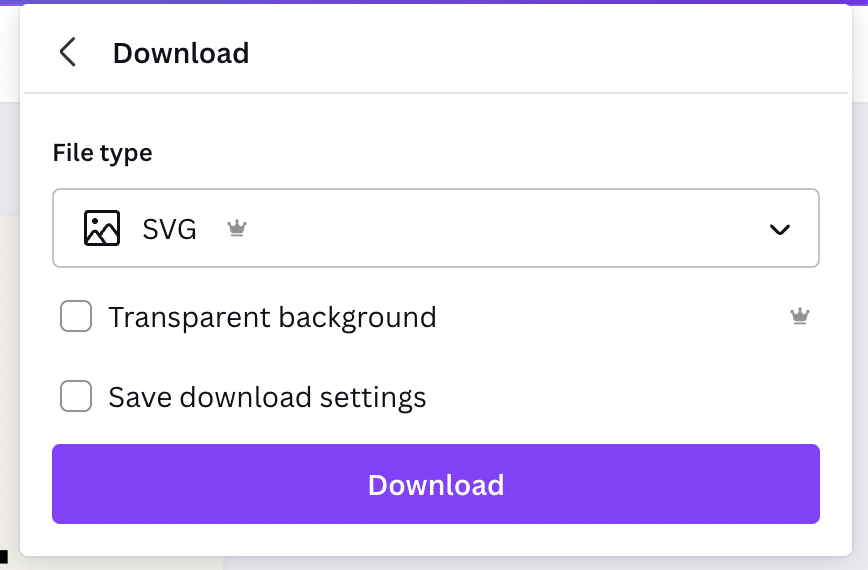
Once you have completed your design and are satisfied with the result, it’s time to save it as an SVG file. Click on the “Download” button within Canva’s interface, and select the option to save your creation as an SVG file. Canva will generate the SVG file, preserving all the vector data and ensuring the scalability and quality of your design.
Congratulations! You now have a fully functional SVG file ready for use. We hope these steps have been clear and straightforward, allowing you to harness the power of SVGs for all your design needs.
With SVGs, you can confidently resize your graphics without worrying about loss of quality or excessive file sizes. Embrace the versatility and convenience of this format, and unlock a world of creative possibilities with scalable vector graphics.