Have you ever wondered how to make your website more accessible to all users, including those with visual impairments? Well, one simple but crucial step in achieving that is adding alt tags to your images.
Alt tags, short for alternative text, provide a textual description of an image, which can be read aloud by screen readers, making your content more inclusive and user-friendly.
So, let’s go through the process of adding alt tags to images in WordPress. Don’t worry; it’s a breeze!
What Exactly Are Image Alt Tags?
Alt tags are like little text descriptions that you can attach to your images. They serve two main purposes:
Accessibility
Alt tags help visually impaired users understand the content of your images when their screen readers read them aloud.
SEO
Search engines use alt tags to understand what your images are about, which can improve your website’s search engine rankings.
How to Add Alt Tags to Images in WordPress
There are 4 steps to take when adding Alt Tags to images in WordPress:
Step 1: Upload or Select an Image
First things first, you need an image on your WordPress website. You can either upload a new one or select an existing one from your media library.

Step 2: Add or Edit the Image
Once your image is uploaded or you’ve chosen which one you’d like to use, click on it to open the image details.
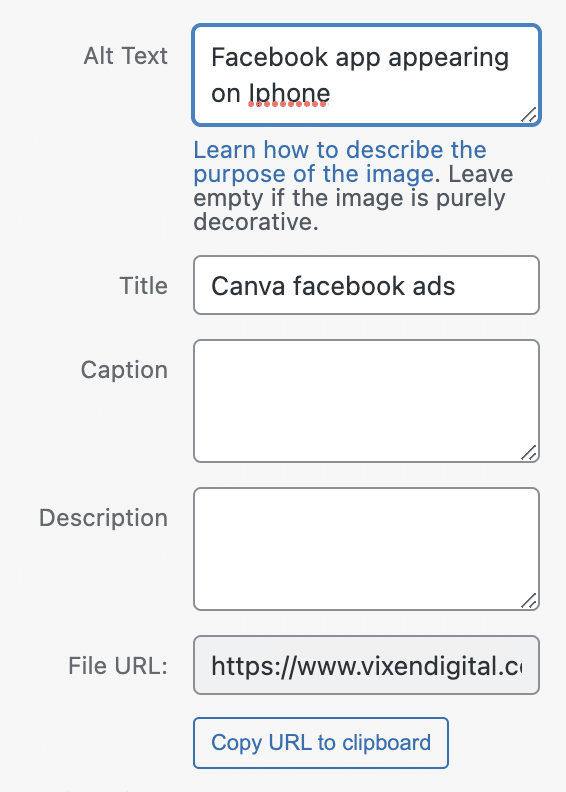
Step 3: Find the Alt Text Field
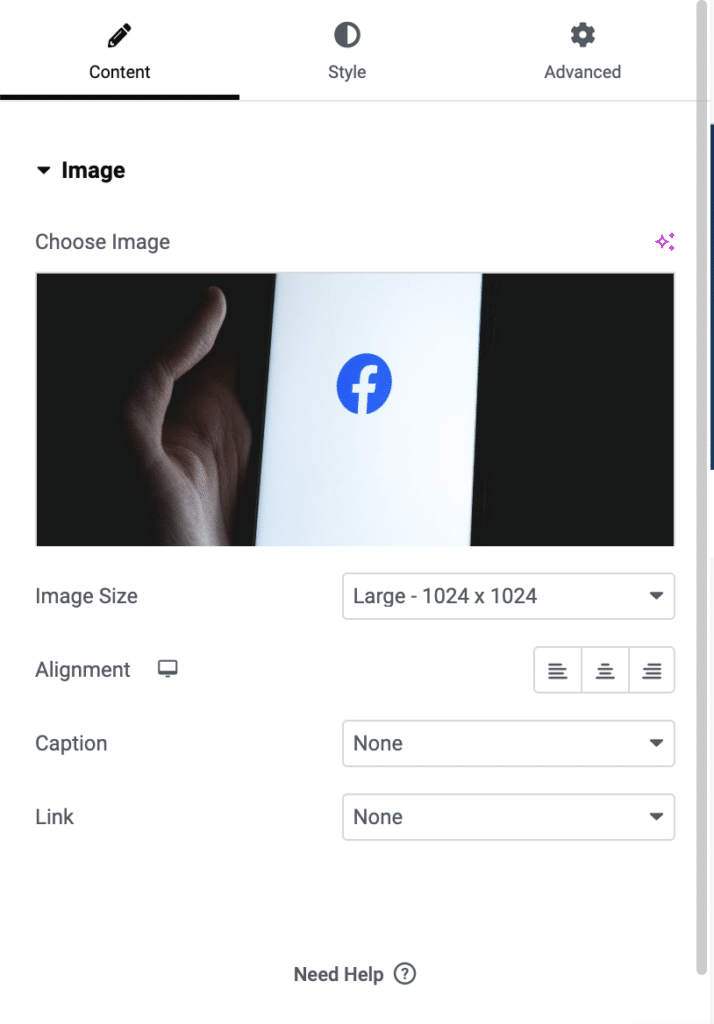
In the image details, look for a field labelled “Alt Text.” It’s usually located in the right-hand sidebar if you’re using the Elementor editor. If you’re using the Classic editor, you can find it below the image details.
Step 4: Add a Descriptive Alt Tag
Now, the fun part! In the Alt Text field, type a short, descriptive text that conveys the purpose or content of your image. Make it clear and concise. Imagine you’re explaining the image to someone who can’t see it.
For example, if you have an image of a cute puppy, your alt text could be something like “Adorable Golden Retriever puppy playing in the park.”
Step 5: Save or Update the Image
After you’ve added your alt text, don’t forget to click the “Save” or “Update” button (depending on whether you’re uploading a new image or editing an existing one). Your alt text is now associated with the image.
A Few Tips for Adding Image Alt Text to Images in WordPress
Before you start adding the Alt Text, make sure to:
- Be descriptive but concise.
- Avoid keyword stuffing; focus on accuracy.
- For decorative images, you can use empty alt-text
- If an image contains text, include that text in the alt tag.
- Test your website with a screen reader to ensure your alt tags work as intended.
And there you have it! You’ve just made your website more accessible and search engine-friendly by adding alt tags to your images.
Remember, accessibility matters, and taking these small steps can make a world of difference to your audience. Plus, it’s a great practice for SEO!
So, go ahead and make your website more inclusive, one alt tag at a time. Your users (and Google) will thank you for it!