How To Install Google Analytics With Google Tag Manager

Learn how to install Google Analytics on your website using Google Tag Manager.

You can either watch the video below or follow along with the step by step guide with pictures.

Watch here

Haven’t set up your Google Tag Manager account yet? Learn how to create an account and install GTM on your WordPress website here.

Hi everyone it’s Sean from Vixen Digital, PPC agency in Brighton. Today I’m
going to be showing you how to install Google Analytics on your website using
Google tag manager so without further delay let’s get started hi everyone and
welcome today we’re going to install Google Analytics using Google tag
manager and we’re going to be using this fake shop my fake website that I’ve got
and we’re going to be using our Google tag manager account and our Google
Analytics account so first things first you need to make sure that you set
yourself up a Google Analytics account and you need to navigate down in the
left-hand side down to the admin section in the admin section you need to go to
tracking info and this is where you can find all the tracking info that you need
so tracking info and inter tracking code in tracking code here is your tracking
ID so you will see this UA number so this stands for universal analytics and
we’re going to go and copy this so I’m just going to copy this code and I’m
gonna go over to Google tag manager in Google tag manager you need to go we’re
going to start and well basically we’re going to create a new tag and this tag
is going to be for the firing of the Google Analytics code on your website to
send over the information to Google Analytics when somebody’s on your site
so we’re going to call this new tag GA so Google Analytics and it’s going to be
universal analytics and it’s going to be off on all pages so in the tag
configuration box if you just click on it we’re going to choose one of the
featured tags and they already inbuilt tags in Google tag manager and this is
the Google Analytics Universal analytics tag and it’s going to be a page view
track type and here if this is the first time you’re setting up this this Google
Analytics tracking is that you will need to set up a variable
as well so we’re going to set up a new variable by clicking on new variable I’m
going to call this the name of our tracking code we’re going to go back in
here the tracking ID is that tracking code and I’m just going to hit save and
this will take us back to the tag setup and then in the tag setup the trigger
that I want to select is the all pages trigger so this trigger is telling the
tag when to fire so we’re telling the tag to fire on all pages so every single
page on our website this tag will fire and send information over to Google
Analytics so we’re going to select all pages and press save and once we’ve
saved that we’re going to go to preview
and in the preview in debug mode we’re going to go back to our fake shop tab
and I’m going to refresh it and this is going to bring up the the preview and
debug window and I’m just going to check that this tag is firing on this page
which it is so we can see that down at the bottom there and I’m gonna check
that it’s just firing on other pages as well yep check the about page so all
look so you can go through yourself and check all of your pages if you if you
wanted to make sure that it’s firing but in this case it looks it looks all good
so I’m going to return back to my Google tag manager account I’m going to leave
the preview mode and once that’s loaded back up I’m going to submit this change
and I’m going to just label it as added G a tracking and we can destroy a brief
description
there we go and I’m gonna publish that
so once this is published that’s now live on our site so this is the live
version so if I go back to our fake shop and I’m just going to refresh it again
and just check with Google tag assistant that our Google Analytics tag is also
registering there which it is so that’s good news that shows that it’s all set
up and our final check that we can make is that if we we can actually use Google
Analytics itself for that is that if we go to set the about page we can go to
Google Analytics go down to the real-time reporting and if it should
register that with this one user on the site now which should be us so there’s
one user on the site and if we go down to the content that they’re viewing it
should sell us the about page so yep it’s telling us the about page if I
navigate over to the content contact page and then I’ll go to analytics and
just oh there we go sorry it’s already refresh that for me so then you can see
that it is registering which pages that were on so Google tag manager is sending
that information for the analytics code back to analytics so all good said there
we go that’s how we install Google Analytics onto our site using Google tag
manager I hope that helps and yeah look forward to seeing you soon
STEP 1:

Copy your Google Analytics Tracking ID

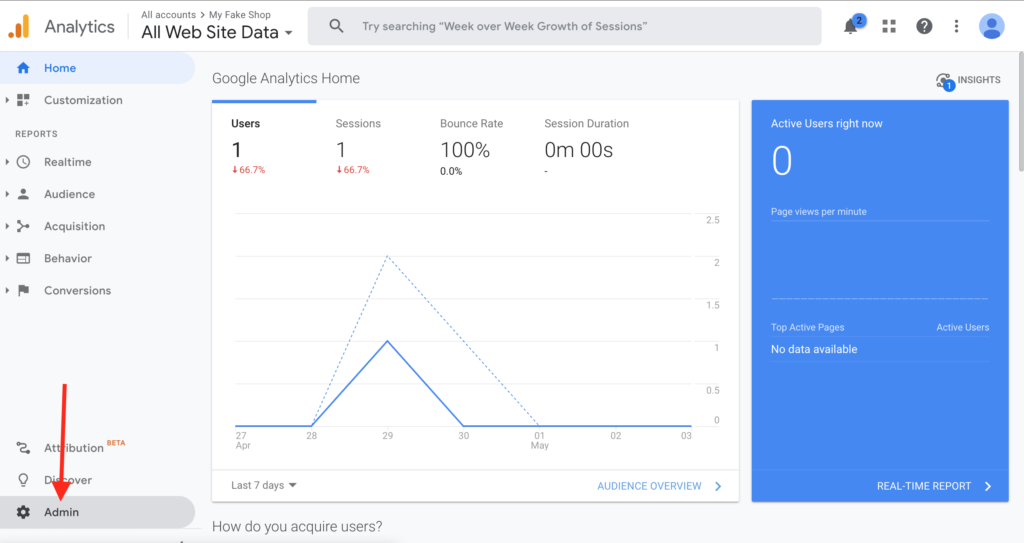
Go to your Google Analytics account and on the left hand side, towards the bottom of the page, you will see the “admin” option. Select this and once the page loads look towards the middle or “property” panel.
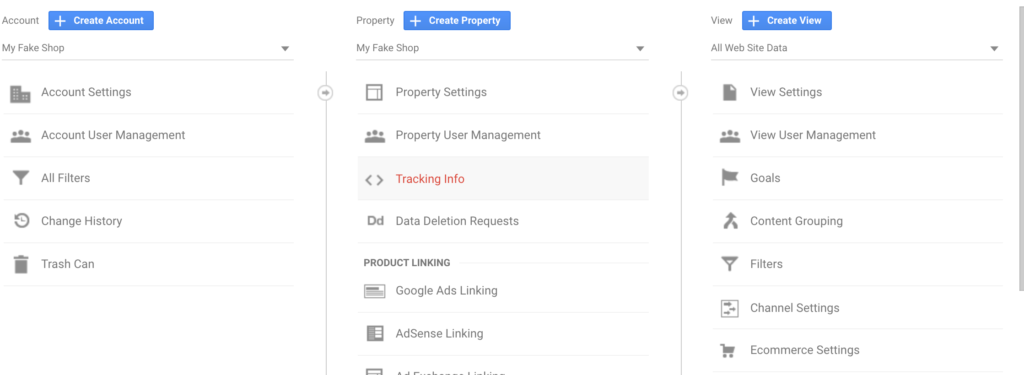
Select “Tracking Info” and then “Tracking Code”.
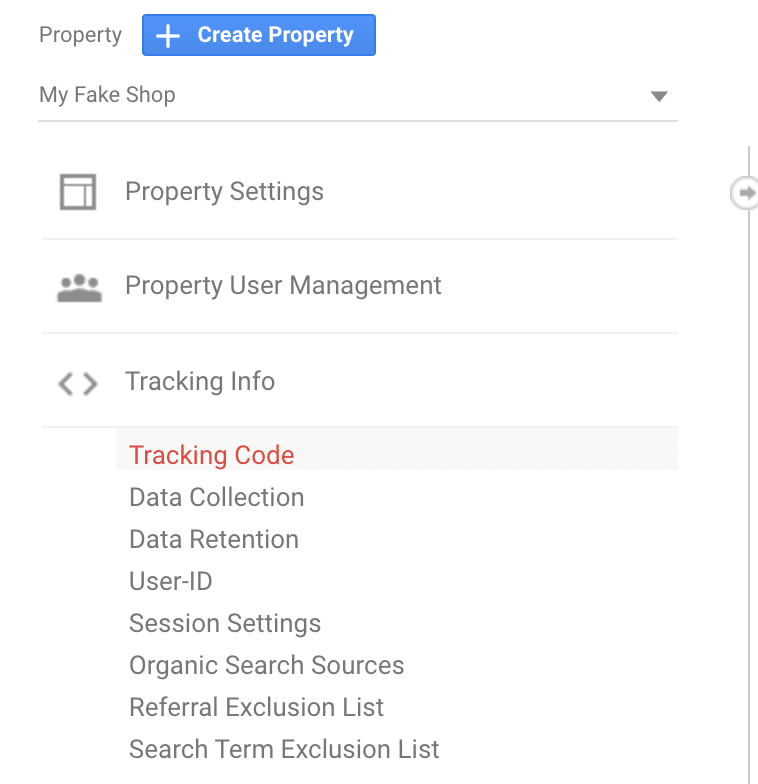
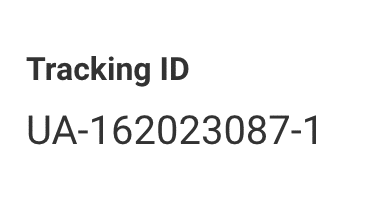
You then need to copy the UA tracking ID number. This usually look like this:

UA-XXXXXXXXX-1 
STEP 2:

Create a new Google Tag Manager tag for Google Analytics

Go to your Google Tag Manager account, open up your GTM container and click to add a new tag.
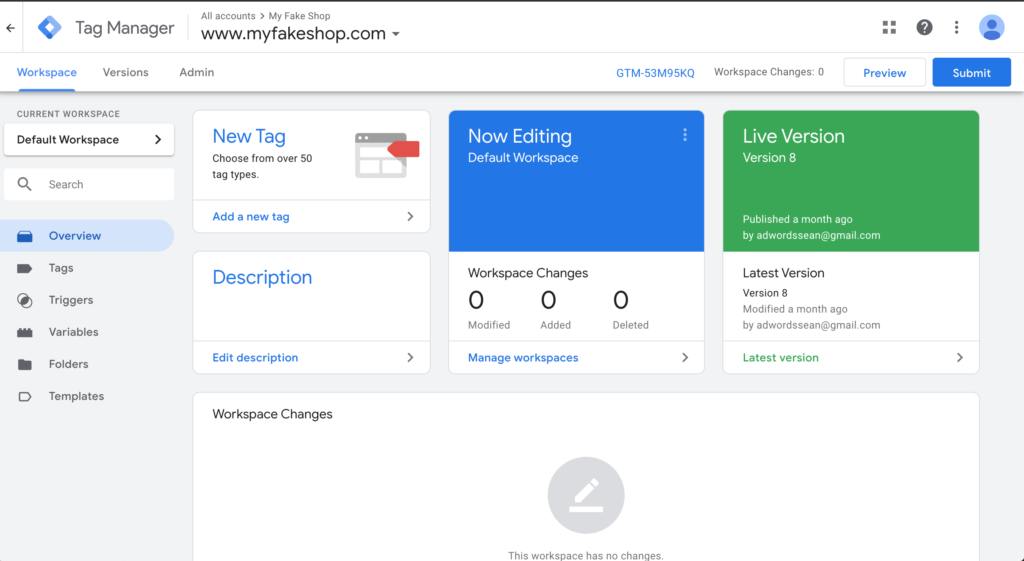
Click on “Tag Configuration” and select the Google Analytics: Universal Analytics featured tag, usually at the top of the featured tag list.
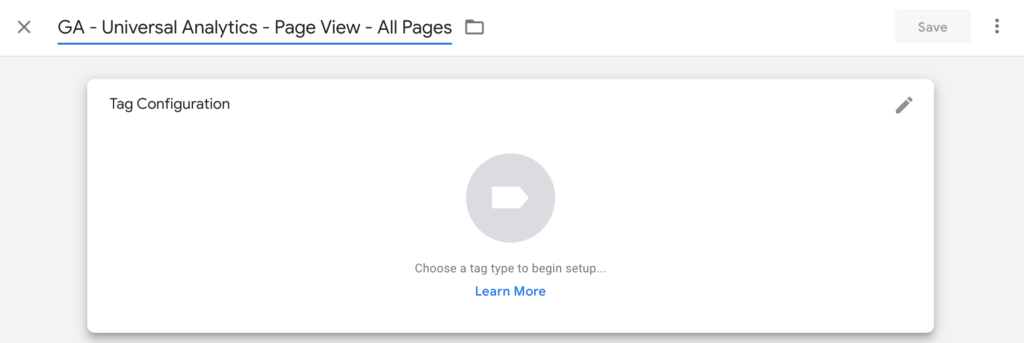
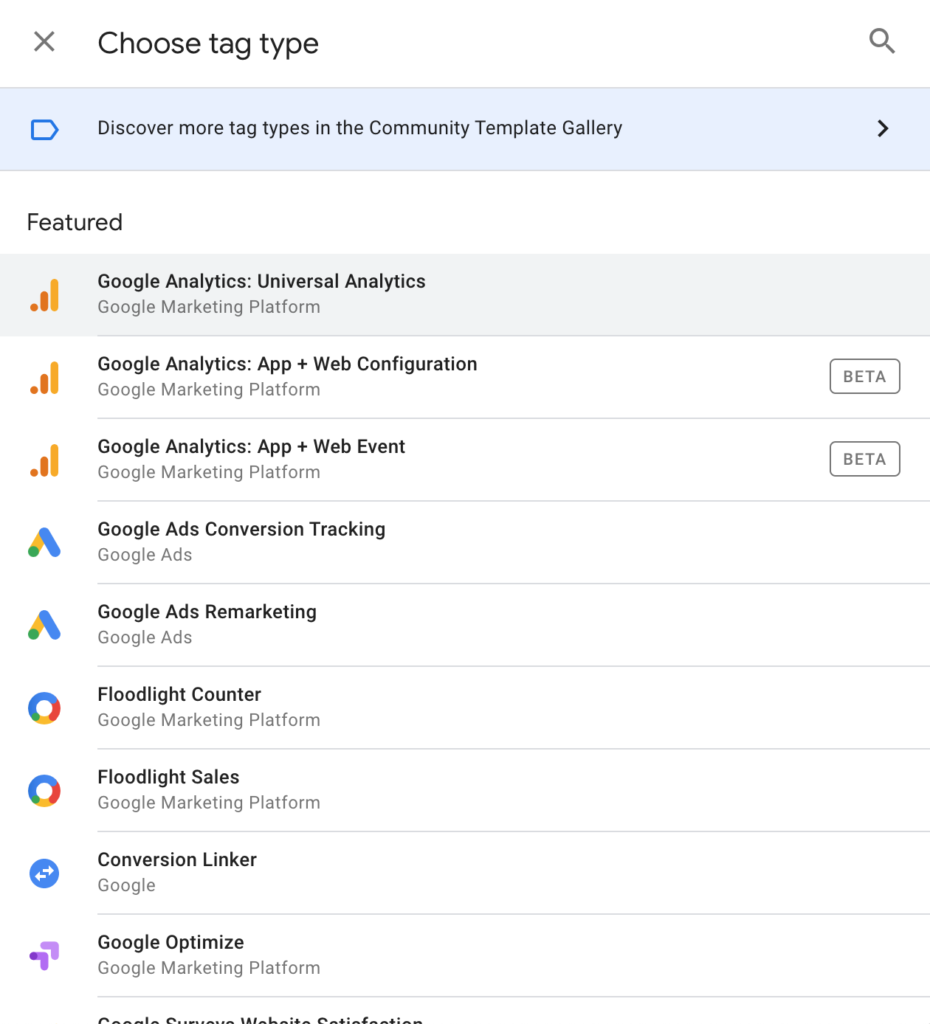
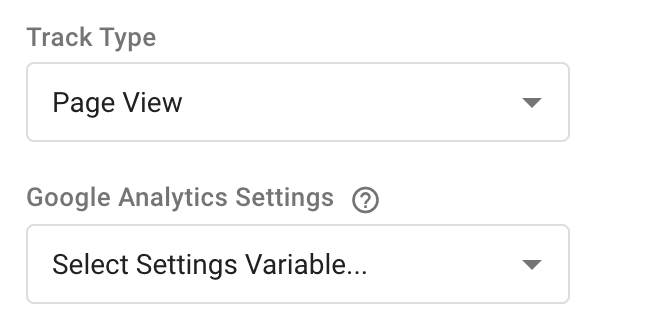
The track type can stay as “page view” and we need to set up a new variable. Click on the drop down in the Google Analytics settings section and select the option to create a new variable.
STEP 3:

Paste Your Tracking ID

You will be taken to the variable creation window where you can now paste your UA tracking ID that you copied to your clipboard. Paste this code in the tracking ID section and in for the title of your variable. This will help you to remember that this is your variable for your Google Analytics tracking ID.
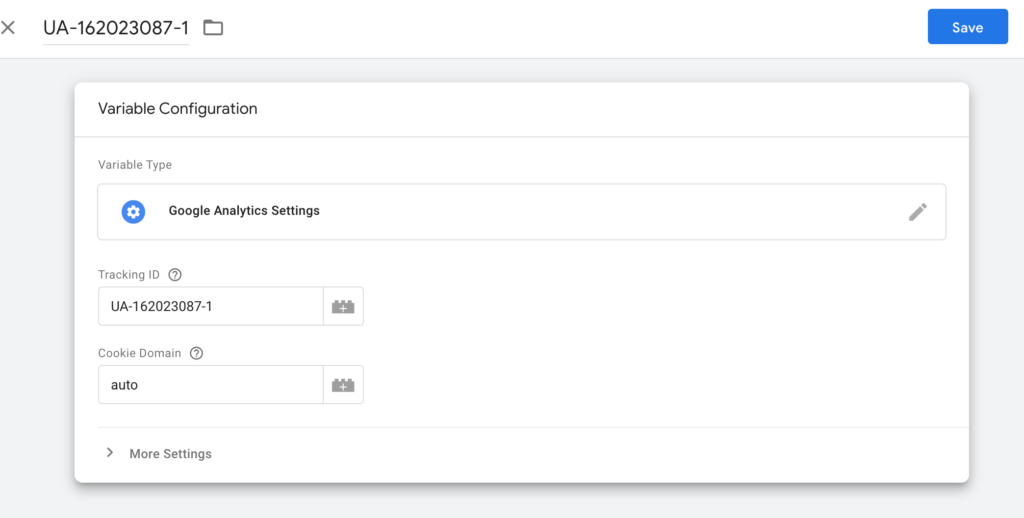
Click “Save” in the top right corner.

STEP 4:

Set up your trigger

Next, you’ll be taken back to your tag setup window where you can select to set up your “Triggering”.

Select your trigger to be “All Pages”. This will trigger your Google Analytics tag to be fired on all pages of your website.

Name your tag in the top left of the tag setup window. Go for a naming format that makes sense to you. For example, “Google Analytics – Page View – All Pages”. Then click “Save”

STEP 5:

Publish your changes

Then all that’s left to do is to publish your changes! Go ahead and hit the “Submit” button on the right hand side, fill in the information fields with as much detail as possible and click “Publish”. Well done! You’ve installed Google Analytics on your website.

Next up...