Learn how to create and install Google Tag Manager on your WordPress website with our simple tutorial.
Watch here
Did you know you can also install Google Tag Manager on WordPress using a plugin?
Google Tag Manager is a free tool provided by Google for the management of your marketing tags on your website or mobile app.
Google Tag Manager is used to implement code snippets or tracking pixels which allow you to track user behaviour on your website, without having to implement code. Google Tag Manager can be used to install things such as Google Analytics and Google Ads tracking as well as your Facebook pixel.
One of the best reasons for using GTM is that it makes it easier and simpler for you to implement tracking on your website without having to work with a web developer. It can save you time and the added cost of hiring a developer.
1. Create Your Google Tag Manager Account
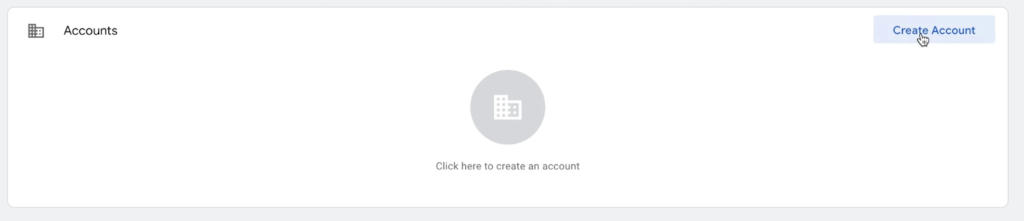
The first thing to do is to create your Google Tag Manager account if you haven’t already created one. Navigate to the Google Tag Manager website, log in if required, and select create account in the top right corner of the user interface.
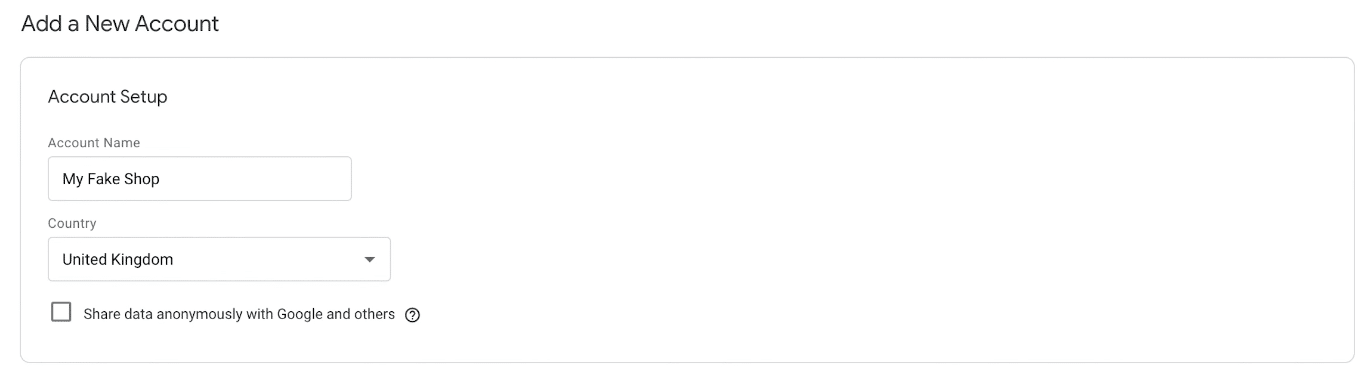
Google Tag Manager will first ask you to name your account and select your country. It is usually best to name your account the same as your business, brand or organisation.
Create your Google Tag Manager container
You will then need to complete the container setup. It is good practice to give your container the same name as the website that you plan to install your GTM container on.
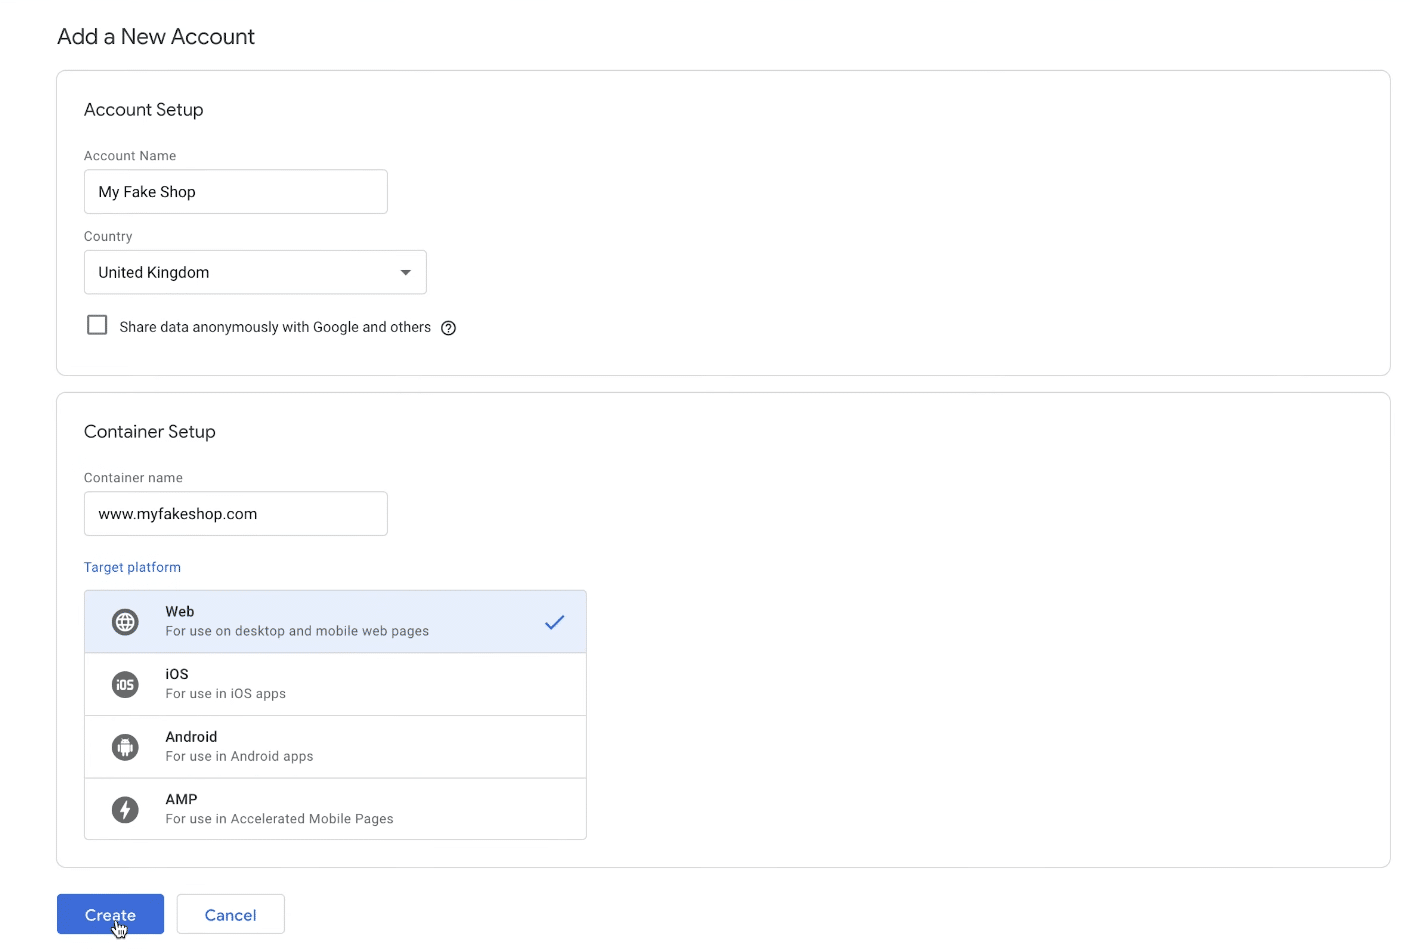
Once you’ve filled in the necessary information, you can click the ‘create’ button, read and accept the terms & conditions and congratulations! Welcome to your new Google Tag Manager account. You will be taken straight to the Google Tag Manager container you have just set up.
If it’s your first time viewing your account you will see a popup installation instructions box with your GTM installation code. If you have dismissed this popup or can’t see it, you can simply click on the GTM container ID in the top navigation bar.
2. Insert Google Tag Manager Code In WordPress
If it’s your first time viewing your account you will see a popup installation instructions box with your GTM installation code. If you have dismissed this popup or can’t see it, you can simply click on the GTM container ID in the top navigation bar.

This will bring up your installation instructions and code snippets.
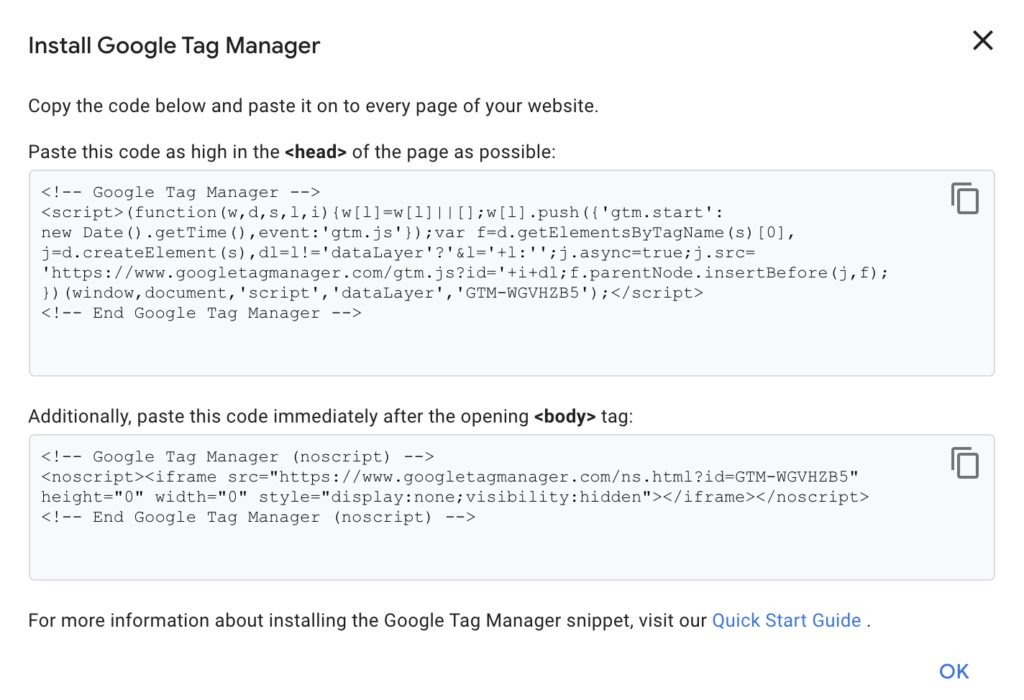
Copy the code in the <head> section and then navigate over to your WordPress website.
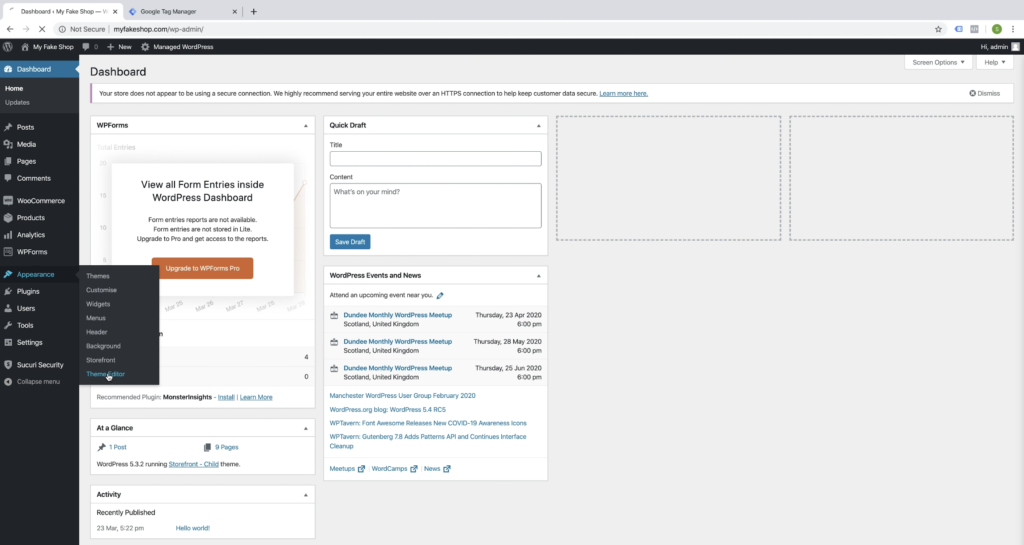
Go to your WordPress dashboard and on the left-hand side navigate down to Appearance > Theme Editor
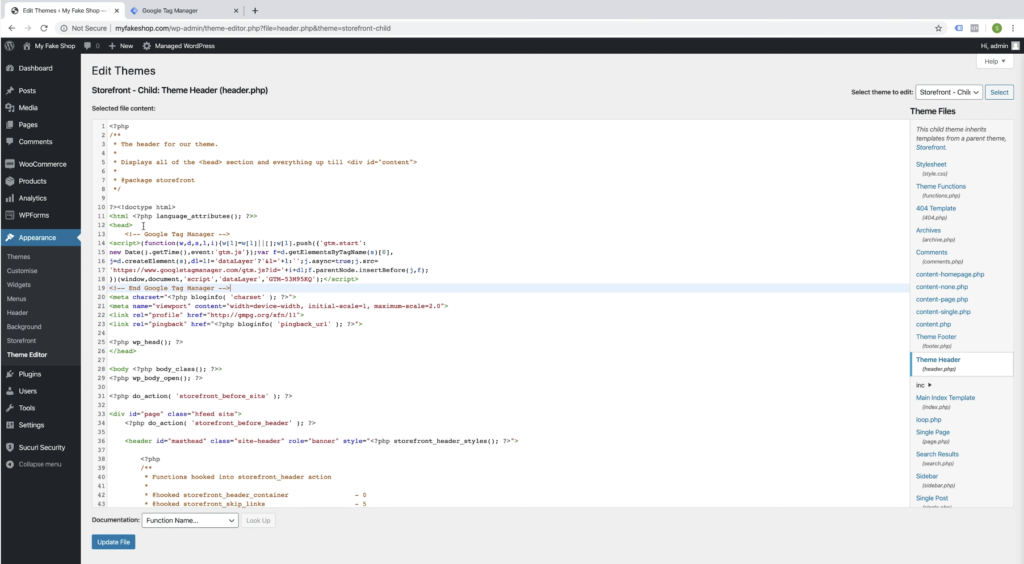
This will open up your theme files. It is strongly recommended that you install and only make changes to a child theme.
You will see your theme files on the right-hand side. Find your Theme Header (header.php) and select it.
In the file content where you can see all of the code, find the <head> tag and just below it, on the next line, paste your Google Tag Manager code.
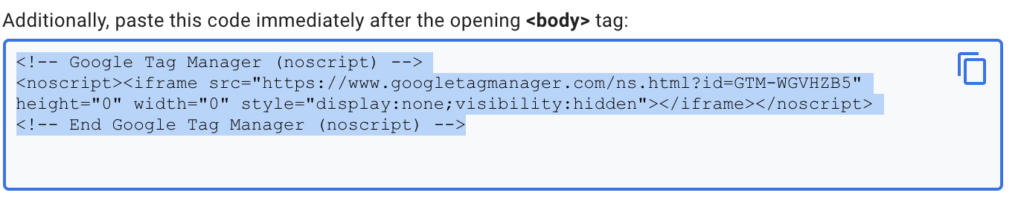
Return to your Google Tag Manager container and this time copy the code from the <body> section
Go back to your WordPress dashboard and navigate back to your theme editor and your Theme Header (header.php) file.
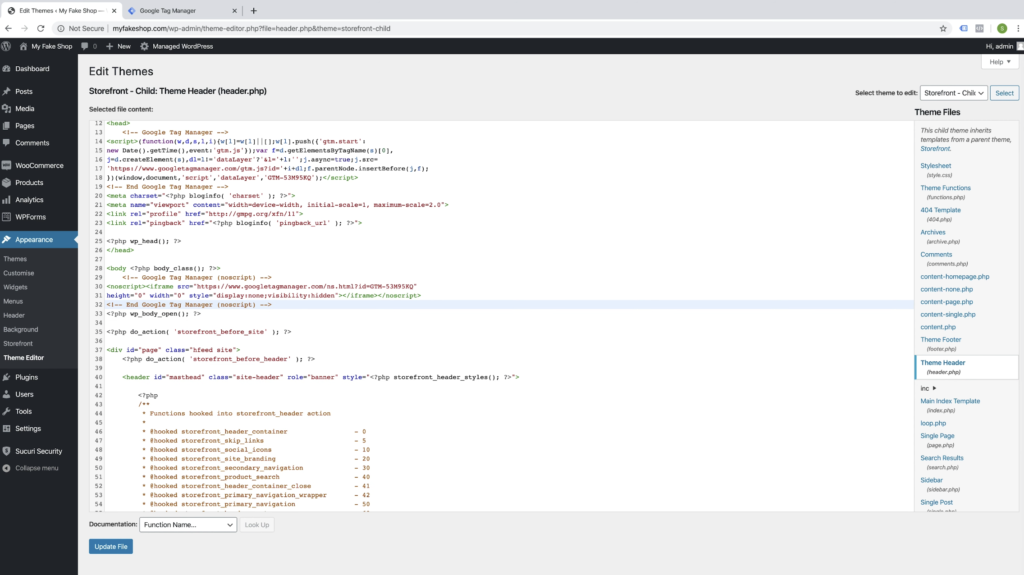
This time find the <body> tag and paste your code on the line directly beneath that.
Then click the blue “Update File” button.
3. Test Your GTM Installation
You can test that your installation has been implemented correctly by using Google’s Tag Assistant Chrome extension.
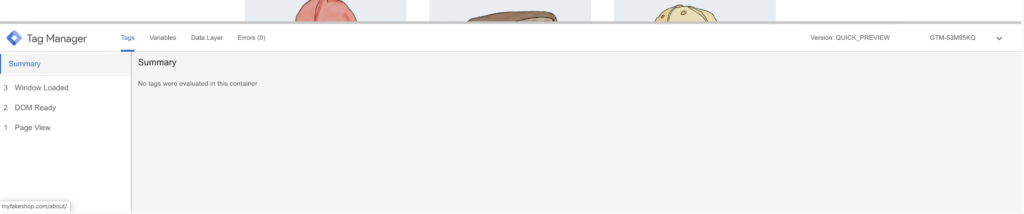
Alternatively, you can navigate back to GTM and enter the “Preview” mode.


Once you have entered preview mode, view your site in another tab on your browser. If GTM has been installed correctly, you will see the GTM debug window appear towards the bottom of your screen.
4. Publish
You can then return to your GTM interface and leave preview mode. Click the “Submit” button and enter as much information as you can in the submission configuration boxes about the changes you have made.
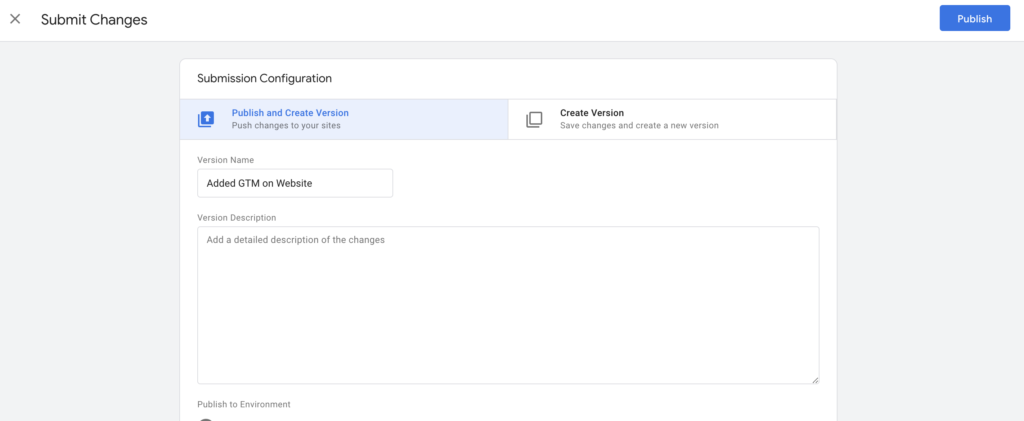
Then click “Publish”.
Congratulations! You’re all done! You’ve successfully installed Google Tag Manager on your WordPress website.